사이드 프로젝트로 구현중인 게시판 프로젝트에서
Spring Security와 jwt를 이용하여 댓글 작성 및 삭제 기능을 구현하고 있는중,
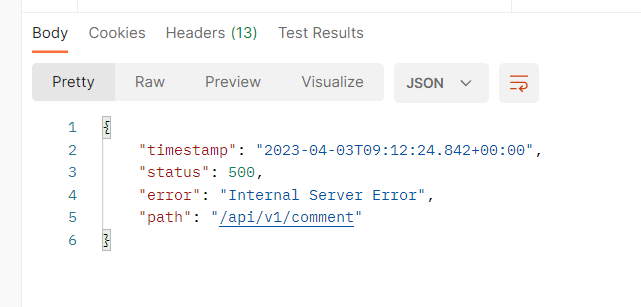
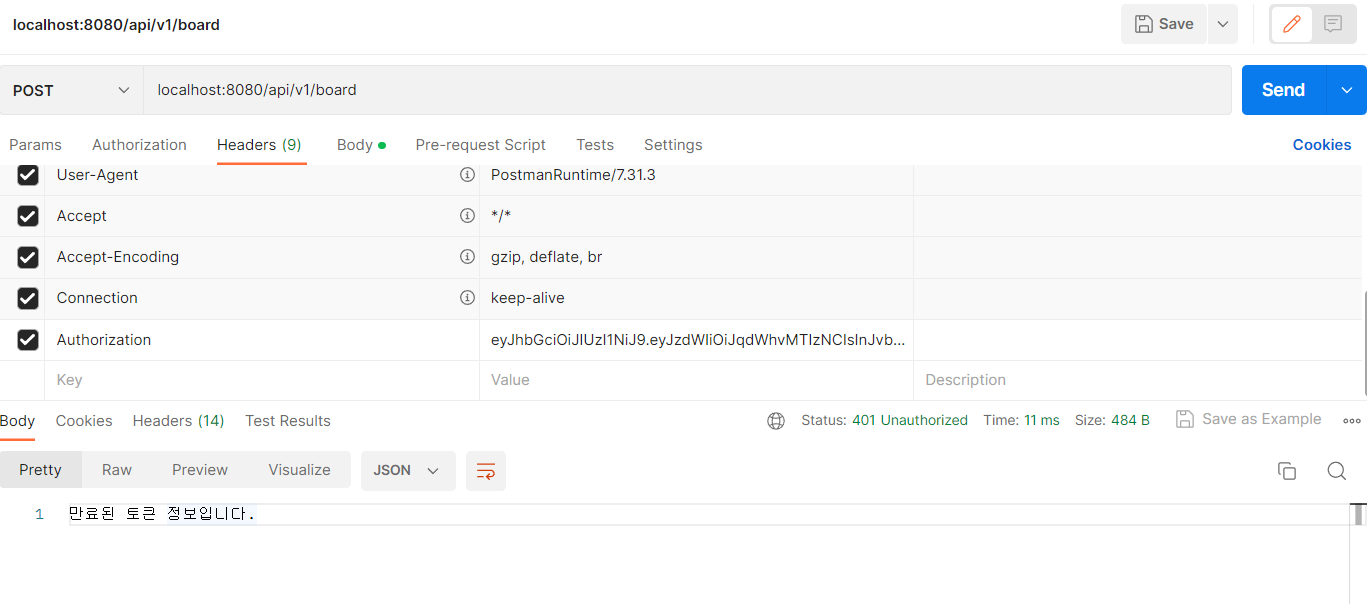
헤더에 jwt 토큰을 입력했을 때, 만료된 토큰이거나 토큰을 잘못 입력하면 500 서버에러가 나왔다.
이건 클라이언트 측 문제이기 때문에 예외처리를 따로 진행해야겠다는 생각이 들어 예외처리 방법을 알아보았다.
일단, SecurityConfig 파일에, 해당 Url을 추가시키니 403 Forbidden으로 출력이 되는것을 확인 할 수 있었다.
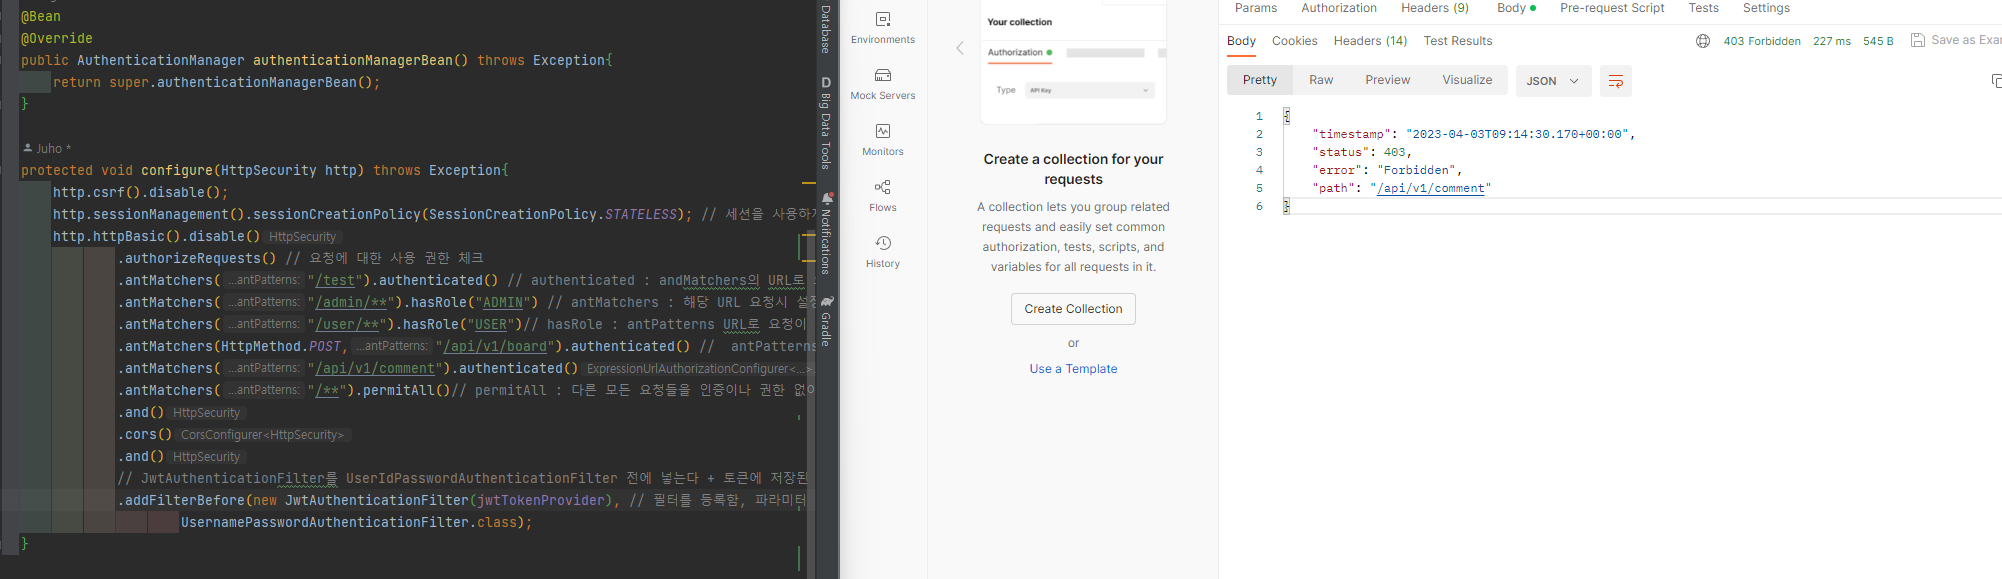
400대 에러가 나오긴 했지만, 어떤 문제가 있는지 클라이언트 측으로 보내주기 위해 설정들을 검색해 추가해보기로 했다.
구글링을 해보니, 내가 프로젝트 내에서 예외처리를 하던 방식인 Controller Advice는 Spring Security단에는 적용이 되지 않았고, 다른 방법을 사용해야했다.
잘못했던 방식
잘못했던 방식
Spring에서 제공하는 AuthenticationEntryPoint를 통해 Spring Security에서 예외가 발생되면 반환되는 AuthenticationException을 감지하여 후처리를 해주는 인터페이스를 통해 예외처리를 할 수 있었다.
따라서 exception 패키지를 만들고, CustomAuthenticationEntryPoint 클래스를 만들어 위의 인터페이스를 implements 후 구현해주었다.
먼저 JWT에서 발생하는 Exception을 필터링 할 수 있는 JwtExceptionFilter 클래스를 만들어 발생하는 예외의 종류들을 분기처리하여 , request에 해당 에러에 대한 코드를 담았다.
@Slf4j
@RequiredArgsConstructor
@Component
public class JwtExceptionFilter extends OncePerRequestFilter {

    private final ObjectMapper objectMapper;

    @Override
    protected void doFilterInternal(HttpServletRequest request, HttpServletResponse response, FilterChain filterChain) throws ServletException, IOException {
        response.setCharacterEncoding("utf-8");

        try{
            filterChain.doFilter(request, response);
        } catch (ExpiredJwtException e){
            //만료 에러
            request.setAttribute("exception", ErrorMessage.EXPIRED_TOKEN.getCode());

        } catch (MalformedJwtException e){
            //변조 에러
            request.setAttribute("exception", ErrorMessage.WRONG_TYPE_TOKEN.getCode());

        } catch (SignatureException e){
            //형식, 길이 에러
            request.setAttribute("exception", ErrorMessage.WRONG_TYPE_TOKEN.getCode());
        }
    }
}
이렇게 발생된 에러 형식을 CustomAutyenticationEntryPoint라는 앞서 말했던 AuthenticationEntryPoint 인터페이스를 구현한 클래스에서 Response로 응답시켜주게끔 처리를 했다.
@Slf4j
@Component
public class CustomAuthenticationEntryPoint implements AuthenticationEntryPoint {
    @Override
    public void commence(HttpServletRequest request, HttpServletResponse response, AuthenticationException authException) throws RuntimeException, ServletException, IOException {
        String exception = (String)request.getAttribute("exception");

        if(exception == null) {
            setResponse(response, ErrorMessage.UNKNOWN_ERROR);
        }
        //잘못된 타입의 토큰인 경우
        else if(exception.equals(ErrorMessage.WRONG_TYPE_TOKEN.getCode())) {
            setResponse(response, ErrorMessage.WRONG_TYPE_TOKEN);
        }
        //토큰 만료된 경우
        else if(exception.equals(ErrorMessage.EXPIRED_TOKEN.getCode())) {
            setResponse(response, ErrorMessage.EXPIRED_TOKEN);
        }
        //지원되지 않는 토큰인 경우
        else if(exception.equals(ErrorMessage.UNSUPPORTED_TOKEN.getCode())) {
            setResponse(response, ErrorMessage.UNSUPPORTED_TOKEN);
        }
        else {
            setResponse(response, ErrorMessage.ACCESS_DENIED);
        }
    }
    //한글 출력을 위해 getWriter() 사용
    private void setResponse(HttpServletResponse response, ErrorMessage errorMessage) throws RuntimeException, IOException {
        JSONObject responseJson = new JSONObject();
        responseJson.put("msg", errorMessage.getMsg());
        responseJson.put("httpStatus", errorMessage.getHttpStatus());
        responseJson.put("code", errorMessage.getCode());

        response.getWriter().print(responseJson);
    }
}
jwt를 통해 발생할 수 있는 예외의 경우는 크게 3가지로 분류되었다.
- 잘못된 타입의 토큰인 경우
- 토큰이 만료된 경우
- 지원되지 않는 토큰인 경우
따라서 그에 맞는 타입을 기존에 사용하고있던 ErrorMessage Enum클래스에 추가하여 사용하였다.
public enum ErrorMessage{
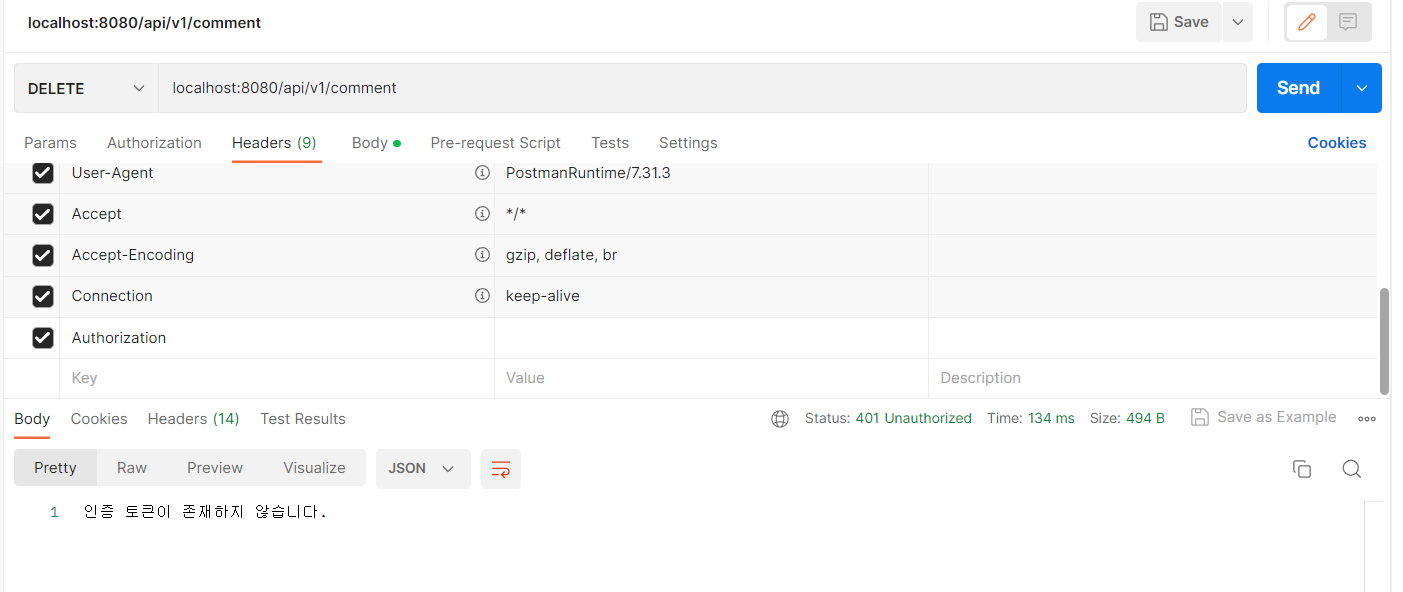
UNKNOWN_ERROR(HttpStatus.UNAUTHORIZED,"인증 토큰이 존재하지 않습니다."),
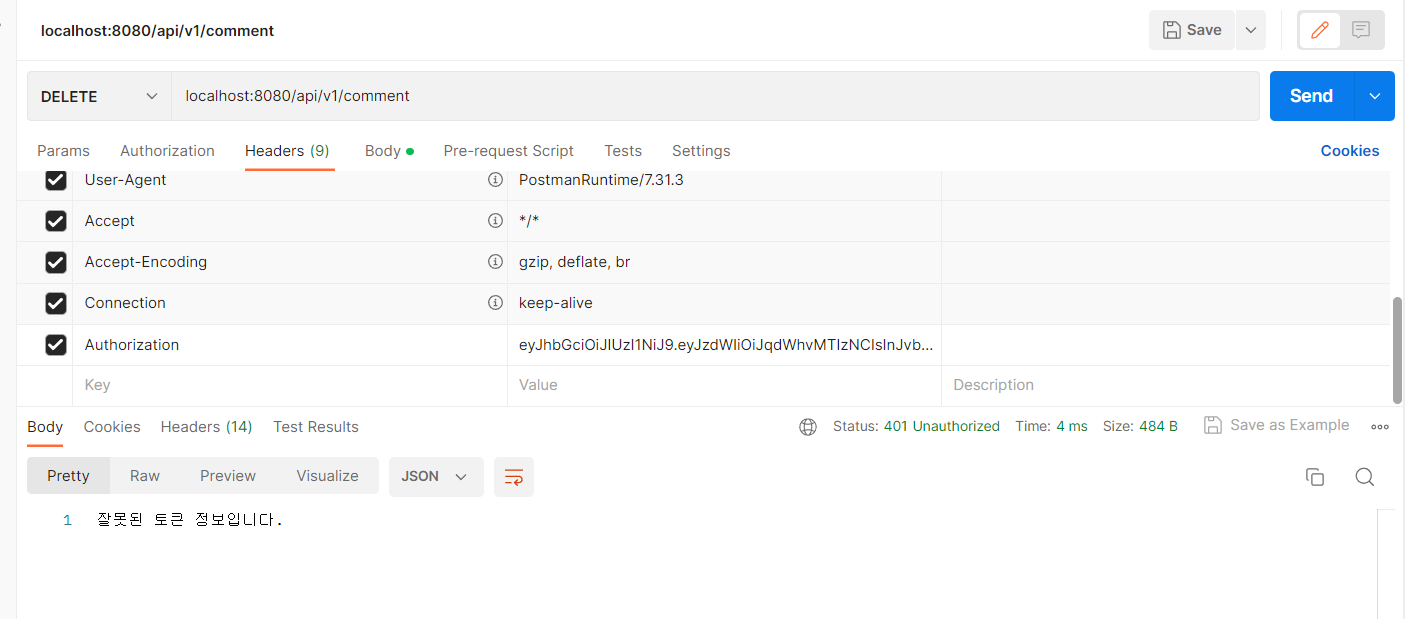
WRONG_TYPE_TOKEN(HttpStatus.UNAUTHORIZED,"잘못된 토큰 정보입니다."),
EXPIRED_TOKEN(HttpStatus.UNAUTHORIZED,"만료된 토큰 정보입니다."),
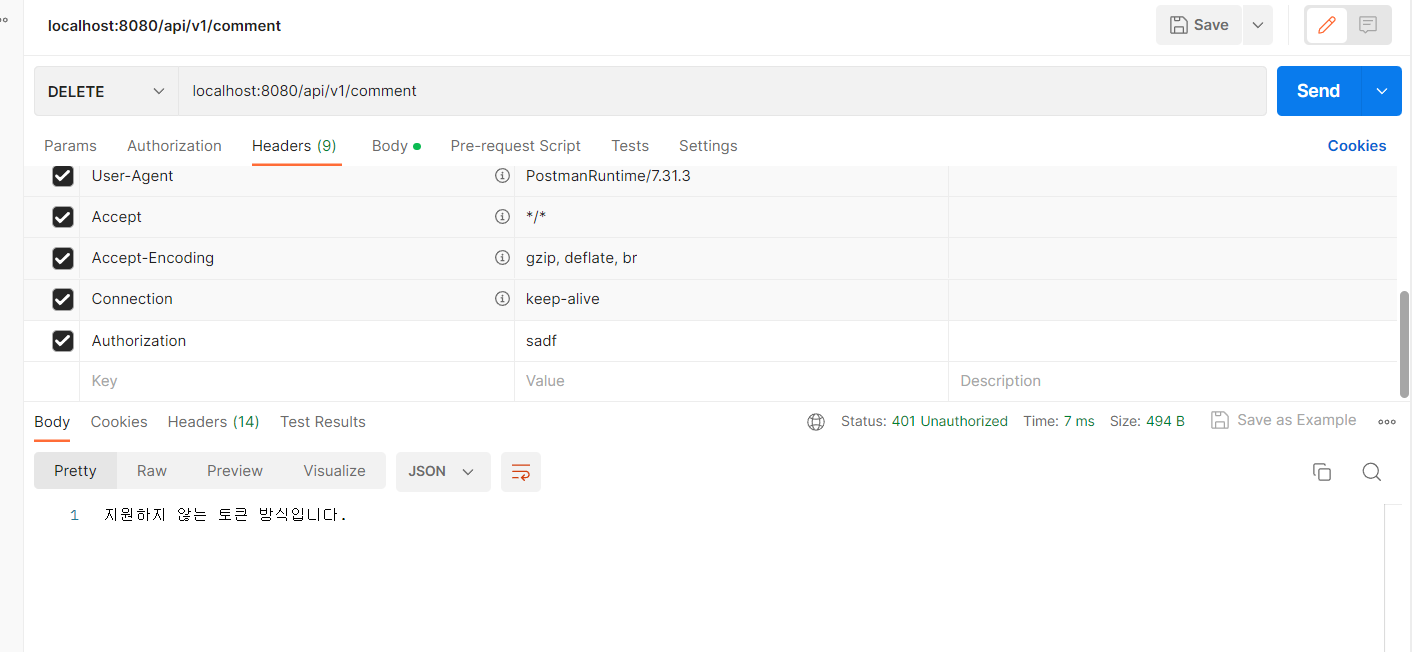
UNSUPPORTED_TOKEN(HttpStatus.UNAUTHORIZED,"지원하지 않는 토큰 방식입니다."),
ACCESS_DENIED(HttpStatus.UNAUTHORIZED,"알 수 없는 이유로 요청이 거절되었습니다.");
''' 중략
}마지막으로 Security Config에 해당 설정들을 추가하여 적용시켜주었다.
@RequiredArgsConstructor
@EnableWebSecurity
public class SecurityConfig extends WebSecurityConfigurerAdapter {
    private final JwtTokenProvider jwtTokenProvider;
    private final JwtExceptionFilter jwtExceptionFilter;
    private final CustomAuthenticationEntryPoint customAuthenticationEntryPoint;

    @Bean
    @Override
    public AuthenticationManager authenticationManagerBean() throws Exception{
        return super.authenticationManagerBean();
    }

    protected void configure(HttpSecurity http) throws Exception{
        http.csrf().disable();
        http.sessionManagement().sessionCreationPolicy(SessionCreationPolicy.STATELESS); // 세션을 사용하지 않는다고 설정.
        http.httpBasic().disable()
                .authorizeRequests() // 요청에 대한 사용 권한 체크
                .antMatchers("/test").authenticated() // authenticated : andMatchers의 URL로 요청이 오면 인증이 필요하다고 설정
                .antMatchers("/admin/**").hasRole("ADMIN") // antMatchers : 해당 URL 요청시 설정해줌
                .antMatchers("/user/**").hasRole("USER")// hasRole : antPatterns URL로 요청이 들어오면 권한을 확인한다.
                .antMatchers(HttpMethod.POST,"/api/v1/board").authenticated() //  antPatterns 에 대한 HTTP POST 요청이 인증되어야 함을 말해 준다.
                .antMatchers("/api/v1/comment").authenticated()
                .antMatchers("/**").permitAll()// permitAll : 다른 모든 요청들을 인증이나 권한 없이 허용
                .and()
                .cors()
                .and()
                .exceptionHandling()
                .authenticationEntryPoint(customAuthenticationEntryPoint) // entryPoint 적용
                .and()
                // JwtAuthenticationFilter를 UserIdPasswordAuthenticationFilter 전에 넣는다 + 토큰에 저장된 유저정보를 활용하여야 하기 때문에 CustomUserDetailService 클래스를 생성
                .addFilterBefore(new JwtAuthenticationFilter(jwtTokenProvider), // 필터를 등록함, 파라미터 - 1번째 : 커스텀한 필터링, 2번쨰 : 필터링전 커스텀 필터링 수행
                        UsernamePasswordAuthenticationFilter.class)
                .addFilterBefore(jwtExceptionFilter,JwtAuthenticationFilter.class); // jwt 에러처리를 위한 필터등록
    }
}
적용시켜 프로젝트를 다시 돌려 postman으로 확인하니
대충 구현은 되었지만, Body에 내용이 담기고 Status와 코드가 200으로 찍히는것을 확인 할 수 있었다.
따라서 CustomAuthenticationEntryPoint의 setResponse 메서드를 수정하여 Status와 코드를 내가 원하는 값으로 설정을 해줄 필요가 있었다.
private void setResponse(HttpServletResponse response, ErrorMessage errorMessage) throws RuntimeException, IOException {
response.setStatus(errorMessage.getCode());
response.getWriter().print(errorMessage.getMsg());
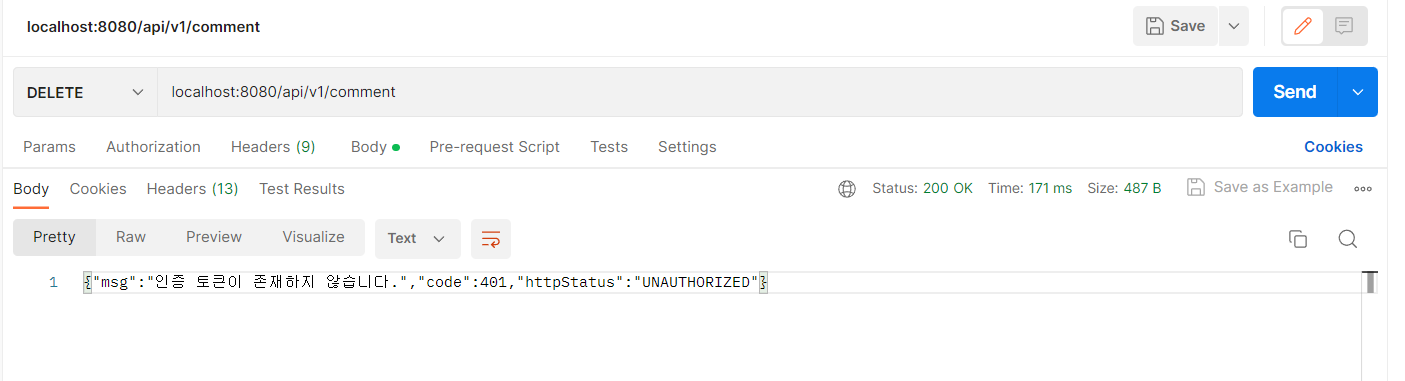
}위와같이 setResponse 메서드의 response에 Status를 지정하고 Writer을 이용해 msg를 넣어 전송시키면
이렇게 메세지에는 인증 토큰이 존재하지 않는다는 내용과 함께
HttpStatus와 응답코드가 정상적으로 나오는걸 확인 할 수 있다.
수정한 방식
아,, 다 된 줄 알았는데 계속 테스트를 하다보니
exception이 null로 되며 인증 토큰이 존재하지 않는다는 메세지만 주구장창 뿌리는 현상이 나타났다.
너무 겉핥기 식으로 분석을 하며 적용을 시켰음을 인정하고 다시 분석을 해보았다,,
일단 filterChain이 무엇인지 유추해보니
Security Configure에서 설정한 addFilterBefore의 필터였다. 나는 이전에
.addFilterBefore(jwtExceptionFilter,JwtAuthenticationFilter.class); // jwt 에러처리를 위한 필터등록라고 선언을 했기 때문에, jwtExceptionFilter(DI로 객체로 넣음)의 클래스에서의 filterChain.doChain은 JwtAuthenticationFIlter 클래스의 doFilter를 한다는 의미였다(고 이해함,,??)
그리고 CustomAuthenticationEntryPoint가 자꾸 원하는 방식대로 적용이 되지 않아 좀 찾다보니,
내가 원했던 Exception 별로 분기를 처리하기 위해서는 해당 AuthenticationEntryPoint로는 적용이 안되는것을 확인했다.
(EntryPoint 에서는 Exception을 AuthenticationException으로 잡아서 던지기 때문에)
따라서 해당 CustomAuthenticationEntryPoint 클래스를 삭제하고, JwtExceptionFilter에서 Response 처리를 하기로 결정했다.
일단 Exception처리를 위해 기존 JwtAuthenticationFilter영역을 분석해봤다.
@RequiredArgsConstructor
public class JwtAuthenticationFilter extends GenericFilterBean {

    private final JwtTokenProvider jwtTokenProvider;

    @Override
    public void doFilter(ServletRequest request, ServletResponse response, FilterChain chain) throws IOException, ServletException {
        // 헤더에서 JWT 를 받아옴
        String token = jwtTokenProvider.resolveToken((HttpServletRequest) request);
        // 유효한 토큰인지 확인
        if(token != null && jwtTokenProvider.validateToken(token)){
            Authentication authentication = jwtTokenProvider.getAuthentication(token);
            SecurityContextHolder.getContext().setAuthentication(authentication);
        }
        chain.doFilter(request, response);
    }
}
디버깅을 통해 분석을 해보니, if문의 validateToken 부분에서 에러를 발생시키고 있었고,
해당 JwtTokenProvider 클래스의 validateToken에서 분기 처리해주기로 하였다.
public boolean validateToken(String jwtToken) {
    try {
        Jws<Claims> claims = Jwts.parser().setSigningKey(secretKey).parseClaimsJws(jwtToken);
        return !claims.getBody().getExpiration().before(new Date());
    }catch (SignatureException e) {
        log.info("SignatureException");
        throw new JwtException(ErrorMessage.WRONG_TYPE_TOKEN.getMsg());
    } catch (MalformedJwtException e) {
        log.info("MalformedJwtException");
        throw new JwtException(ErrorMessage.UNSUPPORTED_TOKEN.getMsg());
    } catch (ExpiredJwtException e) {
        log.info("ExpiredJwtException");
        throw new JwtException(ErrorMessage.EXPIRED_TOKEN.getMsg());
    } catch (IllegalArgumentException e) {
        log.info("IllegalArgumentException");
        throw new JwtException(ErrorMessage.UNKNOWN_ERROR.getMsg());
    }
}
validateToken 메서드에 데이터를 처리하는 부분에 try-catch문을 걸어 Exception별로 분기처리를 하여
JwtException을 발생시켰다.
@Slf4j
@RequiredArgsConstructor
@Component
public class JwtExceptionFilter extends OncePerRequestFilter {

    @Override
    protected void doFilterInternal(HttpServletRequest request, HttpServletResponse response, FilterChain chain) throws ServletException, IOException {
        try {
            chain.doFilter(request, response);
        } catch (JwtException ex) {
            String message = ex.getMessage();
            if(ErrorMessage.UNKNOWN_ERROR.getMsg().equals(message)) {
                setResponse(response, ErrorMessage.UNKNOWN_ERROR);
            }
            //잘못된 타입의 토큰인 경우
            else if(ErrorMessage.WRONG_TYPE_TOKEN.getMsg().equals(message)) {
                setResponse(response, ErrorMessage.WRONG_TYPE_TOKEN);
            }
            //토큰 만료된 경우
            else if(ErrorMessage.EXPIRED_TOKEN.getMsg().equals(message)) {
                setResponse(response, ErrorMessage.EXPIRED_TOKEN);
            }
            //지원되지 않는 토큰인 경우
            else if(ErrorMessage.UNSUPPORTED_TOKEN.getMsg().equals(message)) {
                setResponse(response, ErrorMessage.UNSUPPORTED_TOKEN);
            }
            else {
                setResponse(response, ErrorMessage.ACCESS_DENIED);
            }
        }
    }

    private void setResponse(HttpServletResponse response, ErrorMessage errorMessage) throws RuntimeException, IOException {
        response.setContentType("application/json;charset=UTF-8");
        response.setStatus(errorMessage.getCode());
        response.getWriter().print(errorMessage.getMsg());
    }
}
해당 JwtAuthenticationFilter를 실행시키는 chain.doFilter구문에
try - Catch를 걸고, 해당 JwtException이 발생되었을 때
(JwtTokenProvider의 validateToken에서 throw new 시킨 JwtException)
발생시켰던 메세지로 분기처리를 해서 setResponse 메서드를 통해 Client에게 전달시켰다.
@RequiredArgsConstructor
@EnableWebSecurity
public class SecurityConfig extends WebSecurityConfigurerAdapter {
    private final JwtTokenProvider jwtTokenProvider;
    private final JwtExceptionFilter jwtExceptionFilter;

    @Bean
    @Override
    public AuthenticationManager authenticationManagerBean() throws Exception{
        return super.authenticationManagerBean();
    }

    protected void configure(HttpSecurity http) throws Exception{
        http.csrf().disable();
        http.sessionManagement().sessionCreationPolicy(SessionCreationPolicy.STATELESS); // 세션을 사용하지 않는다고 설정.
        http.httpBasic().disable()
                .authorizeRequests() // 요청에 대한 사용 권한 체크
                .antMatchers("/test").authenticated() // authenticated : andMatchers의 URL로 요청이 오면 인증이 필요하다고 설정
                .antMatchers("/admin/**").hasRole("ADMIN") // antMatchers : 해당 URL 요청시 설정해줌
                .antMatchers("/user/**").hasRole("USER")// hasRole : antPatterns URL로 요청이 들어오면 권한을 확인한다.
                .antMatchers(HttpMethod.POST,"/api/v1/board").authenticated() //  antPatterns 에 대한 HTTP POST 요청이 인증되어야 함을 말해 준다.
                .antMatchers("/api/v1/comment").authenticated()
                .antMatchers("/**").permitAll()// permitAll : 다른 모든 요청들을 인증이나 권한 없이 허용
                .and()
                .cors()
                .and()
                // JwtAuthenticationFilter를 UserIdPasswordAuthenticationFilter 전에 넣는다 + 토큰에 저장된 유저정보를 활용하여야 하기 때문에 CustomUserDetailService 클래스를 생성
                .addFilterBefore(new JwtAuthenticationFilter(jwtTokenProvider), // 필터를 등록함, 파라미터 - 1번째 : 커스텀한 필터링, 2번쨰 : 필터링전 커스텀 필터링 수행
                        UsernamePasswordAuthenticationFilter.class)

                //  jwtExceptionFilter를 JwtAuthenticationFilter 전에 넣는다 // 유저 인증 전, Exception 발생 종류에 따라 분기처리하여 Client에게 전달
                .addFilterBefore(jwtExceptionFilter,JwtAuthenticationFilter.class); // jwt 에러처리를 위한 필터등록
    }
}
마지막으로 SecurityConfig 클래스에 기존의 EntryPoint를 삭제해주며 설정을 마쳤다.
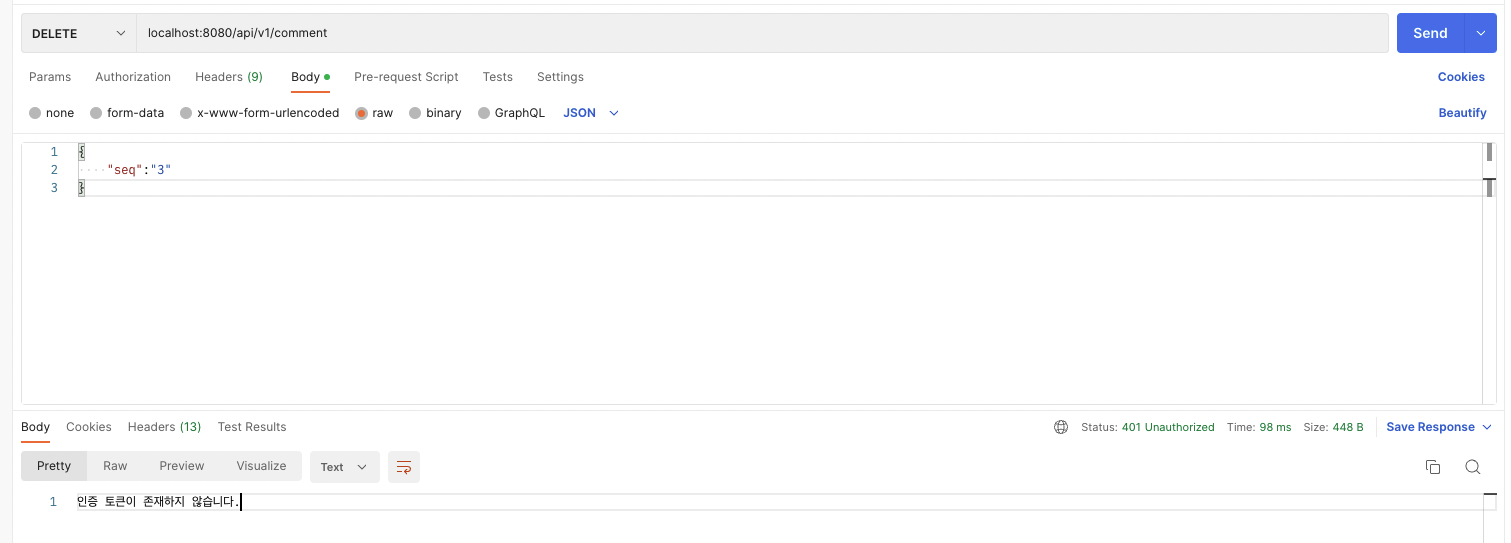
이후 PostMan으로 확인을 해보니
- 토큰이 만료된 경우
- 토큰을 임의의 값으로 변경한 경우
- 토큰 길이 및 형식이 다른 경우
-토큰이 존재하지 않는경우
4가지 모든 경우에 대해서 원하는대로 예외처리 메세지가 출력된 것을 확인 할 수 있었다.
정말 끝..!
'💻Spring' 카테고리의 다른 글
| Github에 프로젝트 민감정보 숨기기 (application.yml) (0) | 2023.04.26 |
|---|---|
| @ModelAttribute , @RequestParam 정리 (0) | 2023.04.26 |
| IntelliJ SpringBoot MySql 설정 오류 (0) | 2023.03.17 |
| 프로젝트 - 전자정부프레임워크 이미지 업로드 (0) | 2022.11.01 |
| 전자정부 프레임워크 - 컨트롤러와 jsp ajax로 json 주고받기 (1) | 2022.10.28 |


